
What a mold inspection means
A mold inspection is a structured assessment of a home for mold growth and the moisture conditions behind it. It combines visual examination with moisture readings, and sometimes thermal imaging or other tools, to map where growth is present, how far it extends, and what water source is responsible. The result is a scope of work: what needs remediation, what needs drying, and what needs a separate repair.
Inspection differs from both testing and remediation. Testing samples air or surfaces for laboratory analysis; remediation removes growth. Inspection is the step before either: it decides whether testing is needed at all, and it keeps remediation from guessing. A home can have testing without inspection, but the numbers will not say where to work — and a home can have remediation without inspection, but the scope will be a guess.
This page covers what an inspection examines, the tools used, what the report contains, and when inspection alone is enough versus when it should lead to testing or remediation. If you already see large growth or have active water, inspection still helps scope the job — but do not delay stopping the water while waiting for an appointment.
How an inspection works
The inspection starts with history: past leaks, floods, backups, roof problems, plumbing work, and any previous mold issues, plus where odors are noticed and when they are strongest. History directs the eyes — a past bathroom leak points at the wall below it, a past basement seep points at the wall-floor joint — and it prevents the common mistake of inspecting only where growth is already visible.
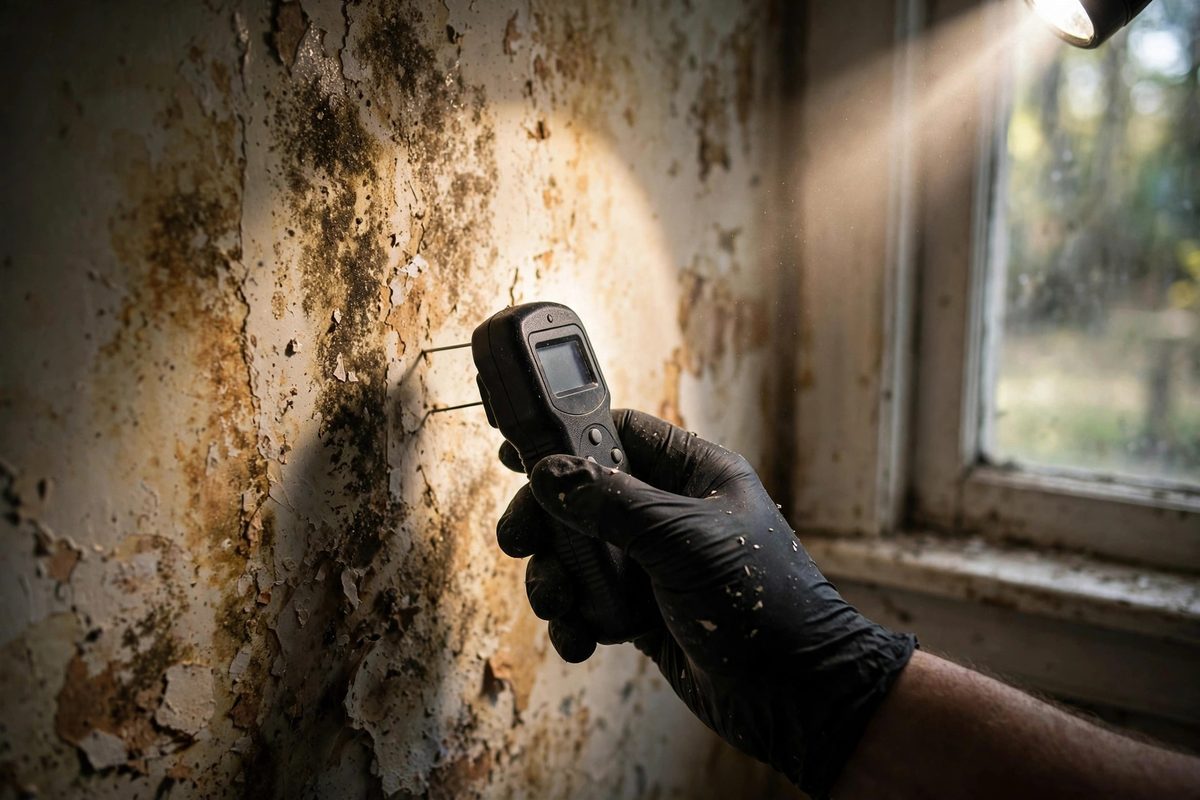
The visual pass follows, room by room, with attention to the places growth hides: behind furniture, inside closets, under sinks, around windows, in basements, and at ceiling lines below bathrooms. Moisture meters are used on suspect walls and floors, because growth behind a surface often shows first as elevated moisture rather than a visible spot. Where readings suggest hidden moisture, the inspector notes it for further investigation rather than guessing at the extent.
Findings are compiled into a report that names each affected area, the likely moisture source for each, and the recommended next step per area: monitor, dry, test, remediate, or repair a separate plumbing or drainage issue. A good report separates confirmed growth from suspected hidden growth, so the homeowner can see what is known and what still needs opening up.
When an inspection is worth booking
- A musty odor with no visible source. The classic hidden-growth case — odor without a spot to point at.
- After any leak, flood, or backup. Even a well-mopped event can leave cavity moisture that inspection catches.
- Before buying or renting. A pre-purchase or pre-move inspection documents conditions before commitments are made.
- Growth that keeps returning. Return growth means the first fix missed the source; inspection finds it.
- Before remediation. Scoping first prevents paying to remediate the visible patch while hidden growth remains.
- Health or odor complaints tied to one room. A room-specific pattern helps inspection focus where it matters.
- After a neighbor's leak in a shared-wall home. Water crosses shared walls, and growth follows it.
- Visible growth in more than one room. Multiple spots usually share a source or a humidity problem worth mapping.
What inspection finds that eyes alone miss
Hidden growth is the main find. Mold behind drywall, under flooring, inside closets, and above ceilings rarely shows itself until it is extensive, but moisture meters and careful visual cues — slight discoloration, warped trim, a faint odor gradient — can locate it before it spreads further. Inspection turns a vague worry into a map.
Moisture sources are the second find, and the more valuable one. A stain on a wall is not a source; the source is the pipe, the seep, the condensation path, or the past event behind it. Inspection traces each affected area back to its water, which is what makes the eventual fix hold instead of repeat.
The third find is scope: which areas are affected, which are merely at risk, and which are clean. That distinction controls cost directly, because remediation priced on a guess is priced on the worst case, while remediation priced on an inspection is priced on the map.
Safe first steps before an inspection
Do not clean, paint, or disturb suspect areas before the inspection — the inspector needs to see conditions as they are. Keep the home in its normal state so readings reflect everyday moisture, not a specially prepared one.
- List every past water event you remember, with dates if possible, even ones that seemed minor.
- Note where odors are strongest and when: morning, after showers, during rain, all the time.
- Clear access to suspect walls, closets, and utility areas where possible, without moving heavy stored items into other rooms.
- Do not run dehumidifiers or fans in suspect rooms right before the visit unless that is their normal state.
- Have the home's layout in mind: which rooms sit below bathrooms, beside plumbing walls, or over basements.
The visit step by step
- Review history: leaks, floods, backups, renovations, and odor patterns.
- Walk the home room by room, noting visible growth, stains, and moisture cues.
- Take moisture readings on suspect walls, floors, and ceilings.
- Use additional tools where readings suggest hidden moisture.
- Map each affected area and trace it to its likely water source.
- Note clean areas as well as affected ones, so scope stays honest.
- Decide per area: monitor, dry, test, remediate, or repair a separate issue.
- Deliver a written report with findings, sources, and recommended next steps.
Cost factors (no prices listed)
| Factor | What it changes |
|---|---|
| Home size and layout | A single room differs from a full home with basement and multiple bathrooms. |
| Number of suspect areas | Each area needs its own readings and source tracing. |
| Tool use | Basic moisture readings differ from thermal imaging or cavity checks. |
| Report detail | A simple findings list differs from a scoped report with per-area recommendations. |
| Testing pairing | Inspection alone differs from inspection plus laboratory sampling. |
| Follow-up visits | A post-remediation re-check is a separate visit. |
We do not publish dollar amounts. Confirm scope on the call at (801) 555-0132.
When inspection should not wait
If water is active, if sewage is involved, or if growth is spreading visibly across rooms, call promptly rather than booking a routine inspection — the water and the growth need action first. Call (801) 555-0132 and describe the active problem; for standing water, see emergency water extraction.
FAQ — Mold Inspection
Is an inspection the same as testing?
No. Inspection is a visual and moisture-based assessment that maps growth and its sources. Testing samples air or surfaces for laboratory analysis. Inspection often decides whether testing is needed at all.
Will the inspector open my walls?
Usually not on a first visit. Inspection maps suspected hidden areas and notes where opening is needed; invasive investigation is a separate, agreed step.
Do I need an inspection before remediation?
It is strongly recommended. Without a map, remediation scope is a guess — and guesswork either misses hidden growth or pays to treat clean areas.
What does the inspection report include?
Each affected area, its likely moisture source, and a recommended next step per area, plus clean areas noted so scope stays honest.
Can inspection find mold with no visible signs?
Often, yes — through moisture readings, odor gradients, and visual cues like warped trim or slight discoloration. But no non-invasive inspection can confirm hidden areas are clean.
What should I have ready when I call?
Past water events and dates, odor locations and timing, any visible growth, and your Herriman-area ZIP. Access to suspect rooms helps the visit.
Related services
Continue with Mold Testing, Mold Remediation, Ceiling Water Damage Repair, Basement Mold Removal. Return to water damage repair in Herriman for the full overview.
Herriman notes for mold inspection
For mold inspection in Herriman, UT, history is the most valuable tool in the room. Most hidden growth here follows a water event that was handled at the surface — a mopped floor, a dried carpet, a repainted ceiling — while the cavity stayed wet. The inspector's first job is reconstructing that timeline, because it predicts where growth will be found better than any single reading.
Two-story layouts and finished basements shape Herriman inspections in particular. Bathrooms over living spaces put ceilings and the walls below them on the suspect list, and finished basements hide wall-floor joint moisture behind drywall and trim. An inspection that only checks visible surfaces in these homes will miss the two most common hidden-growth locations.
When comparing options, weigh the report against the price. A cheap inspection that lists only visible spots is not a scope; a useful report names each affected area, its likely source, and the next step per area — including which areas are clean. That map is what keeps remediation honest, so call (801) 555-0132 to start a mold inspection in Herriman, UT.